How does Twinkly mapping work?
Twinkly's technology uses computer vision, a form of machine vision, to identify and map the location of each LED light. It does this by using the smartphone or tablet's camera to create a virtual layout of the lighting. This patented technology is among the innovations that make Twinkly unique.
The technology also includes advanced 3D reconstruction that allows mapping of the layout from different angles until it is perfect. The LEDs in Twinkly products are all individually addressable, and custom chip technology can produce over 16.7 million brilliant colors.
Mapping with Twinkly allows the app to identify the position of the LEDs in the room and map them accordingly. This is key to creating custom layouts and applying advanced effects to Smart Decoration. Here are the steps and some tips for successful mapping with Twinkly:
What is the Twinkly mapping process?
Mapping happens in three phases:
| 1. positioning: | 2. mapping with app* | 3. visualize with app: |
 |
 |
 |
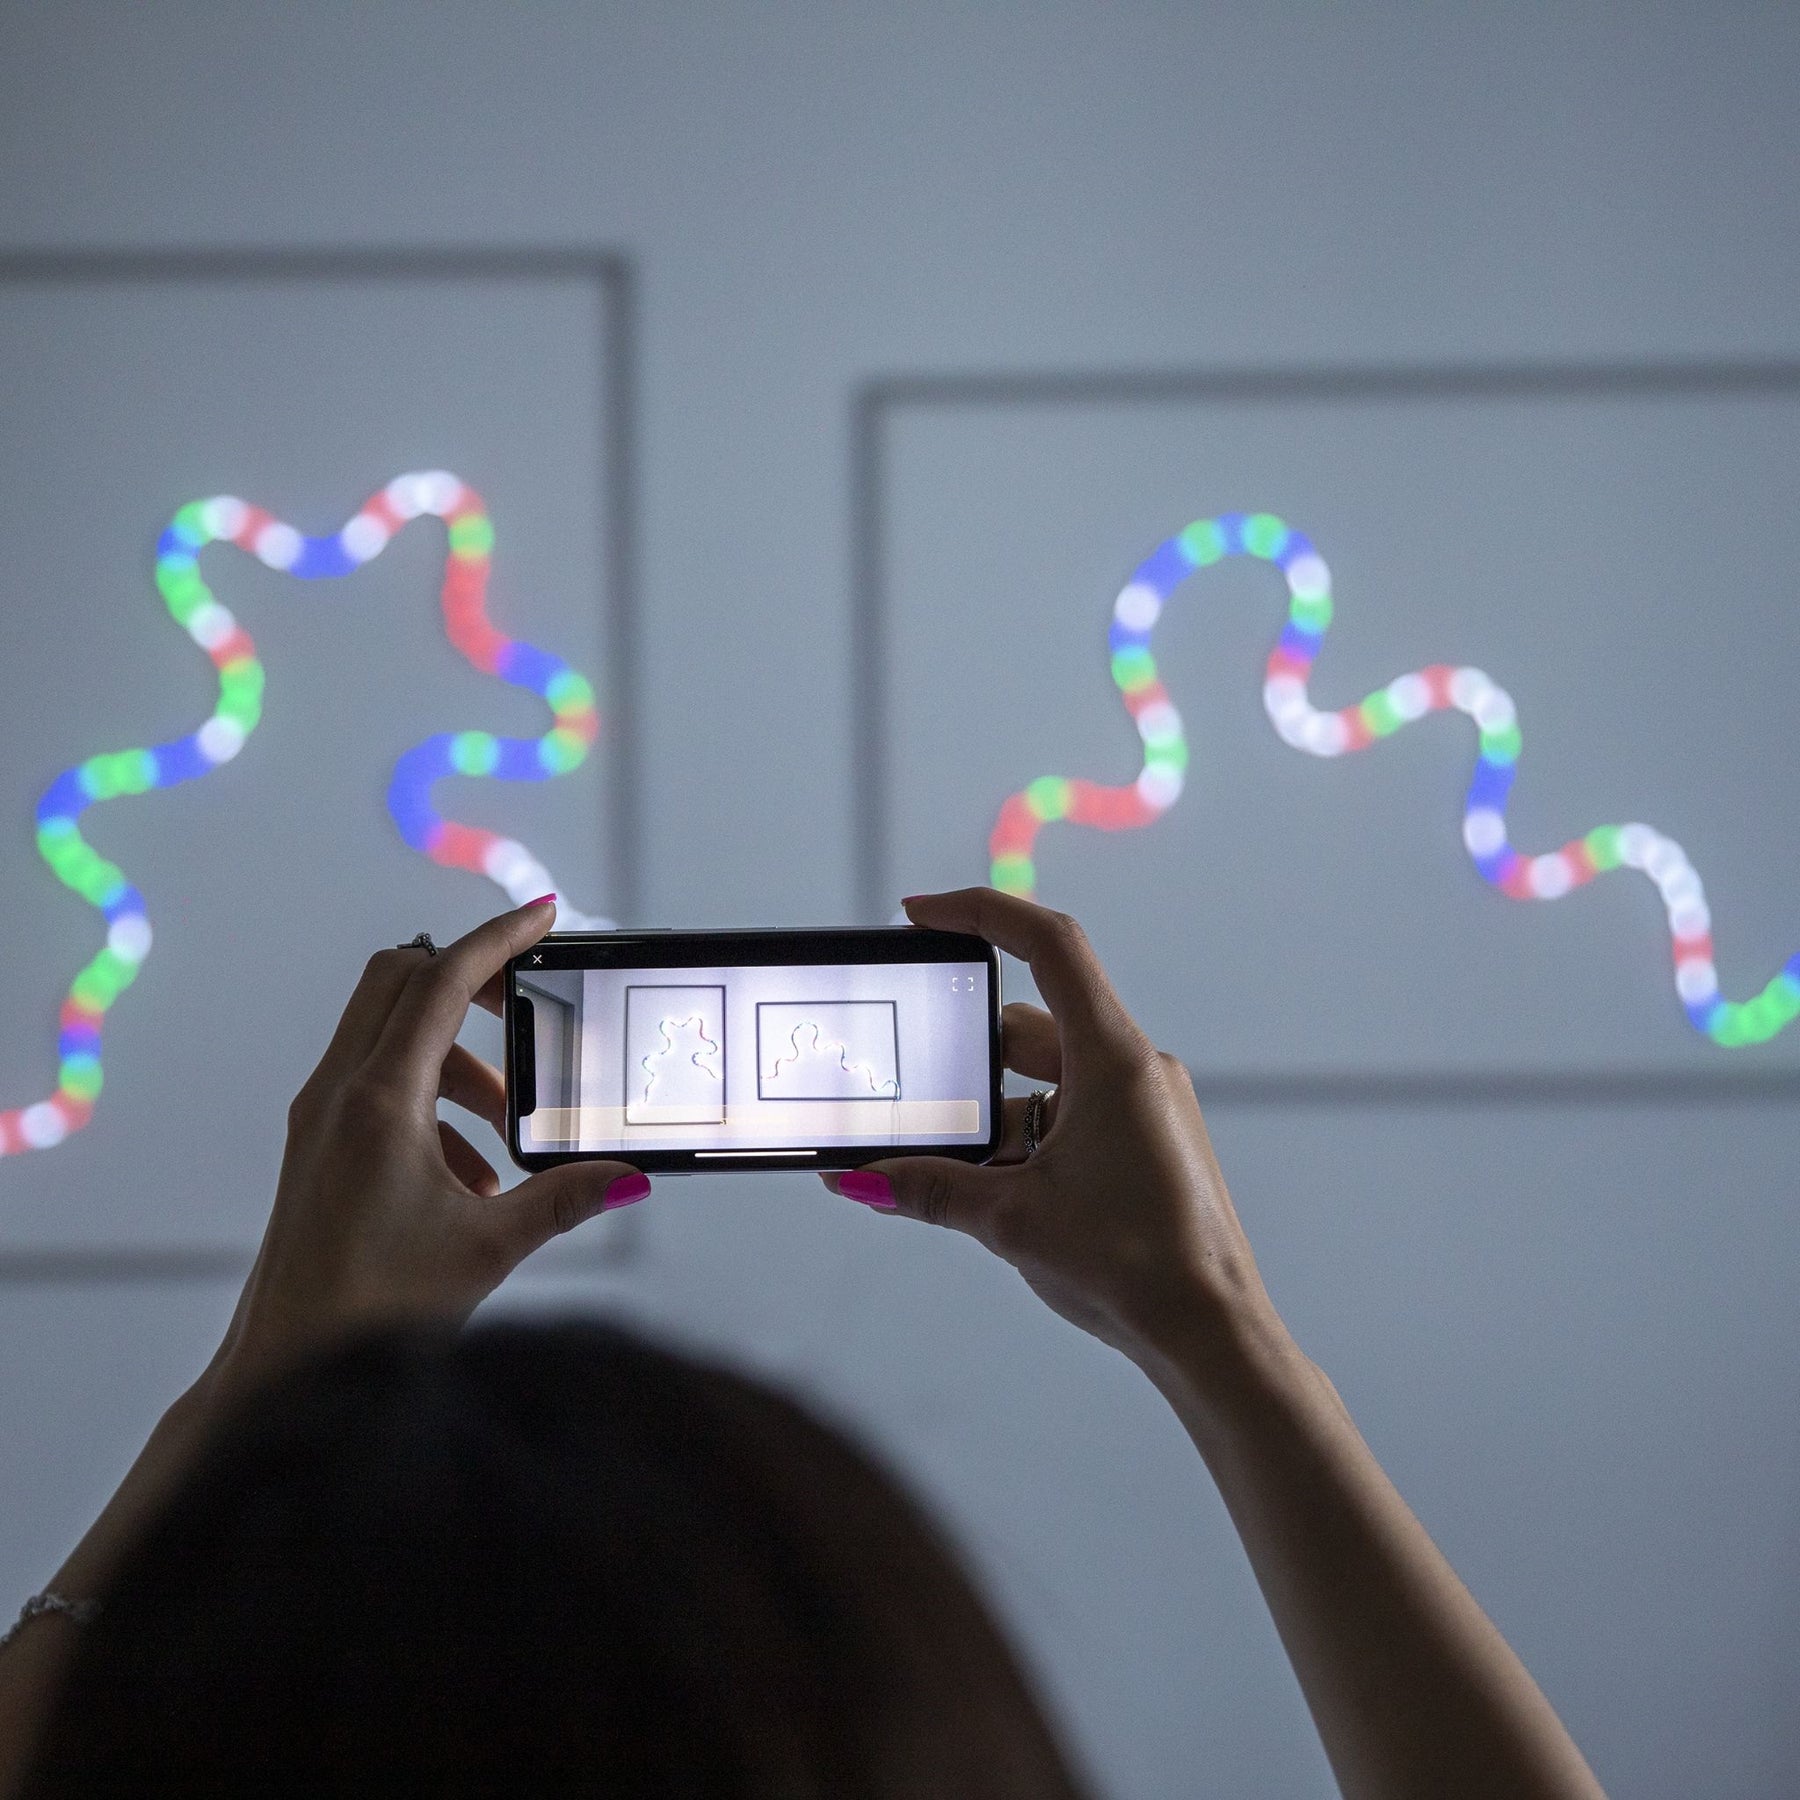
* The Twinkly Controller app allows mapping of LEDs by a special color sequence during mapping. Each LED changes color in a specific sequence, creating a kind of coding. The app uses the camera to detect this coding and perform a mapping of the LEDs. Once an LED is successfully mapped, its color changes from red to green. The process is repeated until all LEDs are detected and displayed as green. This allows for accurate mapping of the LED arrangement, which is the basis for custom control and creation of lighting effects.
Step-by-step instructions in the video
Tips for a perfect Twinkly LED mapping:
- Camera access: make sure the app has permission to access your camera.
- Camera stability: Keep the camera as still as possible.
- Reflection avoidance: Eliminate reflection effects caused by windows, mirrored walls, polished floors, and other reflective objects.
- Ambient light: Reduce the ambient light to get a better contrast between the LEDs and the ambient light, and allow easier detection by the app.
- Avoid too dark environments: In the dark, detecting LEDs with your smartphone's camera can create a halo effect that makes detection difficult. Prefer natural light, but not the direct reflection of the sun.
- Check Wi-Fi connection: Check the status of the Wi-Fi connection before starting the mapping.
- First scan: Start with a first scan and stay as silent as possible until the end of the step.
- Further scans: After the first step, continue with the following ones and stay steady for the entire duration of the scan.
- Red LEDs: if many red LEDs appear at the end of a scan, it means that they are not mapped and you need to do another scan in the same position, moving slightly to change the image section.
Mapping with Twinkly allows you to create a custom layout and apply the most advanced effects to your Smart Decoration. With the above tips and understanding of the mapping process, you can get the most out of your Twinkly lighting system.
Leave a comment